When you’re starting a new Laravel project, it’s important to set things up correctly from the very beginning. Laravel 12 is a powerful framework, but to take full advantage of its features you need the right environment, a clean installation, and an understanding of how routes, controllers, and views fit together.
This guide will walk you step-by-step through setting up a fresh Laravel 12 project — from checking server requirements and choosing an installation method, all the way to building your first route, controller, and view.
By the end, you’ll have a working Laravel app running locally and the confidence to start adding your own features.
1 – Server Requirements
- PHP >= 8.2
- Composer (dependency manager)
- Database: MySQL, PostgreSQL, SQLite, or SQL Server
- Extensions: OpenSSL, PDO, Mbstring, Tokenizer, XML, Ctype, JSON, BCMath
- Node.js >= 18 (with npm) if compiling frontend assets
These tools and extensions allow Laravel to run properly, connect to databases, handle strings, and compile assets.
2 – Installation Options
There are several ways to install a fresh Laravel 12 project. Pick the one that best matches your workflow and environment.
Option A — Composer Create-Project (recommended for most cases)
composer create-project laravel/laravel laravel12-app
cd laravel12-app
What this does: create-project downloads the latest Laravel skeleton into a new folder named laravel12-app. The second line moves you into that project directory so you can run Artisan commands.
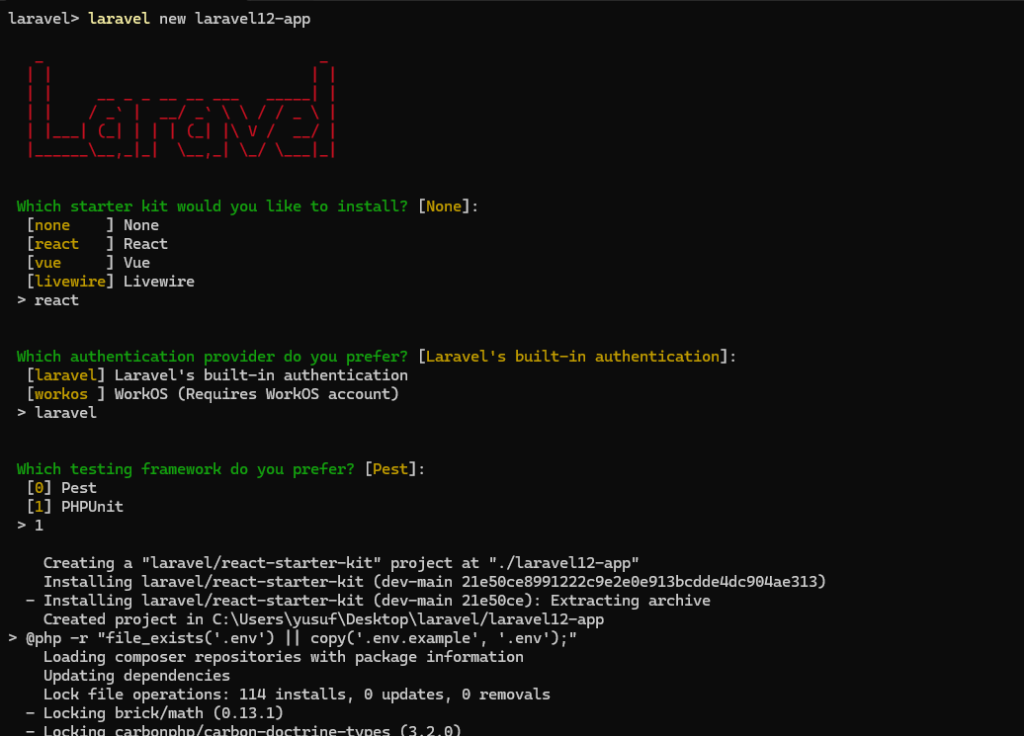
Option B — Laravel Installer (fast scaffolding)
composer global require laravel/installer
laravel new laravel12-appCode language: PHP (php)
What this does: Installs a global laravel command on your system. Running laravel new creates a new Laravel project quickly and can offer extra interactive options in some setups.
Option C — Laravel Sail (Docker environment)
curl -s "https://laravel.build/laravel12-app" | bash
cd laravel12-app
./vendor/bin/sail upCode language: JavaScript (javascript)
What this does: Uses Laravel’s official Docker setup to spin up containers (PHP, MySQL, Redis, etc.) so you don’t need to install those services directly on your machine. sail up starts the containers.
3 – Run the Development Server
php artisan serveWhat this does: Starts Laravel’s built-in development web server (by default at http://localhost:8000). Open that URL in your browser to see the Laravel welcome page.
4 – Create a Sample Route
// routes/web.php

use Illuminate\Support\Facades\Route;
use App\Http\Controllers\HelloController;

Route::get('/hello', [HelloController::class, 'index']);
Code language: PHP (php)
What this does: Registers a GET route at /hello. When someone visits that URL, Laravel calls the index method on HelloController. Routes connect URLs to your application logic.
5 – Create a Controller
php artisan make:controller HelloControllerCode language: CSS (css)What this does: Uses Laravel’s CLI (Artisan) to generate a new controller class file. Controllers group related request-handling logic in one place.
Open app/Http/Controllers/HelloController.php and add the following method:
namespace App\Http\Controllers;

use Illuminate\Http\Request;

class HelloController extends Controller
{
    public function index()
    {
        return view('hello');
    }
}
Code language: PHP (php)
What this does: Defines an index action that returns a Blade view named hello. When the /hello route is hit, this method runs and loads that view.
6 – Create a View
// resources/views/hello.blade.php

<!DOCTYPE html>
<html>
<head>
    <title>Hello Laravel</title>
    <link href="https://cdn.jsdelivr.net/npm/bootstrap@5.3.3/dist/css/bootstrap.min.css" rel="stylesheet">
</head>
<body class="container py-5">
    <h1 class="text-primary">Hello from Laravel 12!</h1>
    <p>This is your first custom page.</p>
</body>
</html>Code language: HTML, XML (xml)
What this does: Creates a simple HTML page styled with Bootstrap. Blade files (ending in .blade.php) are Laravel’s templating system for rendering HTML. Visiting /hello now shows this page.
Conclusion
You now have a fresh Laravel 12 project installed using the method that fits your workflow, plus a working route, controller, and view. Routes map URLs, controllers handle requests, and views render HTML — the core building blocks you’ll use in every Laravel app.

0 Comments