Roles make high-level access control simple, but sometimes you need finer control: specific users may need one or two extra abilities without changing their whole role. That’s where a clean, admin-friendly Permissions UI helps. In this guide, you’ll create a user-friendly interface in Laravel 12 to manage roles and permissions, assign both roles and individual permissions to users, and protect pages using either roles or permissions.
First, make sure your app has basic authentication so only logged-in users can access the Roles & Permissions UI. If you don’t want to use Fortify or Breeze, you can build lightweight login and registration forms as shown in our “Authentication in Laravel 12 (Without Fortify)” article.
When building the forms for creating roles or permissions, you’ll want to validate the inputs properly. See Mastering Validation Rules in Laravel 12 for a deep dive into handling validation cleanly.
For a bigger picture of how roles and permissions fit into a complete app, you may also enjoy: Step-by-Step Guide: Creating a User Roles and Permissions App with Laravel 12.
For simplicity, assume you have a working /login and /register system, with users stored in the users table.
1 – Prerequisites: Install & Configure Spatie
composer require spatie/laravel-permission
php artisan vendor:publish --provider="Spatie\Permission\PermissionServiceProvider"
php artisan migrateCode language: JavaScript (javascript)
This installs tables for roles, permissions, and their relationships. Add the trait to your User model:
// app/Models/User.php
use Spatie\Permission\Traits\HasRoles;

class User extends Authenticatable
{
    use HasRoles;
}Code language: PHP (php)
All users can now be given roles and/or individual permissions through code or the UI we’ll build next.
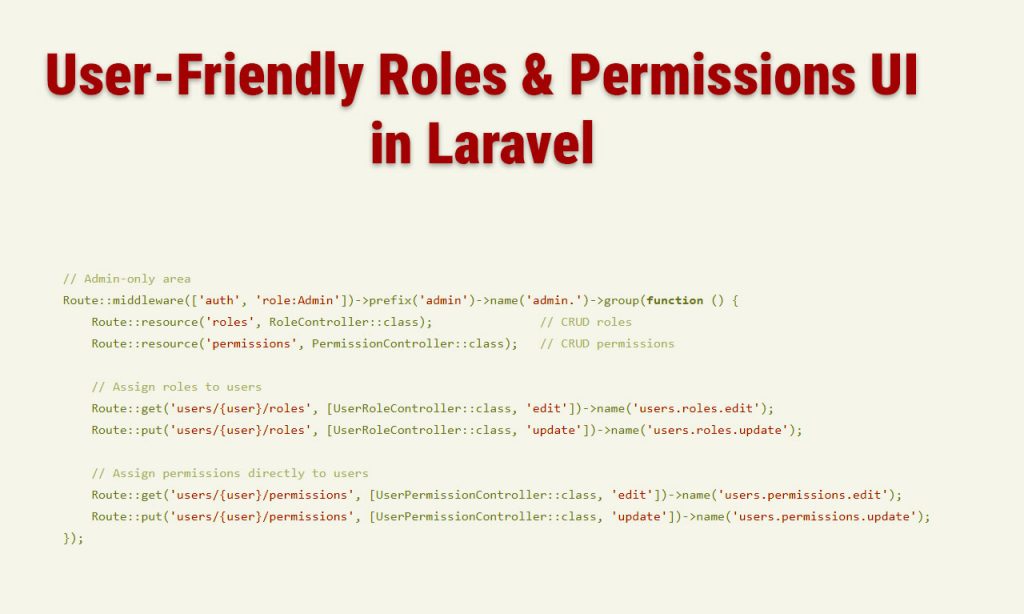
2 – Admin Routes (Roles + Permissions + Assignments)
// routes/web.php

use App\Http\Controllers\Admin\RoleController;
use App\Http\Controllers\Admin\PermissionController;
use App\Http\Controllers\Admin\UserRoleController;
use App\Http\Controllers\Admin\UserPermissionController;
use Illuminate\Support\Facades\Route;

// Admin-only area
Route::middleware(['auth', 'role:Admin'])->prefix('admin')->name('admin.')->group(function () {
    Route::resource('roles', RoleController::class);               // CRUD roles
    Route::resource('permissions', PermissionController::class);   // CRUD permissions

    // Assign roles to users
    Route::get('users/{user}/roles', [UserRoleController::class, 'edit'])->name('users.roles.edit');
    Route::put('users/{user}/roles', [UserRoleController::class, 'update'])->name('users.roles.update');

    // Assign permissions directly to users
    Route::get('users/{user}/permissions', [UserPermissionController::class, 'edit'])->name('users.permissions.edit');
    Route::put('users/{user}/permissions', [UserPermissionController::class, 'update'])->name('users.permissions.update');
});
Code language: PHP (php)
These routes provide separate screens to manage roles, manage permissions, and assign either to users. Everything is under auth + role:Admin to keep it safe.
3 – Permissions Management UI (CRUD)
Create a simple page where admins can add/delete permissions. Keep names consistent like posts.create, users.edit, etc., so the UI stays tidy.
// app/Http/Controllers/Admin/PermissionController.php

namespace App\Http\Controllers\Admin;

use App\Http\Controllers\Controller;
use Illuminate\Http\Request;
use Spatie\Permission\Models\Permission;

class PermissionController extends Controller
{
    public function index()
    {
        $permissions = Permission::orderBy('name')->paginate(15);
        return view('admin.permissions.index', compact('permissions'));
    }

    public function store(Request $request)
    {
        $data = $request->validate([
            'name' => 'required|string|max:255|unique:permissions,name',
        ]);

        Permission::create(['name' => $data['name']]);
        return back()->with('status', 'Permission created.');
    }

    public function destroy(Permission $permission)
    {
        $permission->delete();
        return back()->with('status', 'Permission deleted.');
    }
}
Code language: PHP (php)
Controller actions to list, create, and delete permissions. You can add edit/update later if you want to rename permissions (be mindful of existing assignments).
// resources/views/admin/permissions/index.blade.php

@extends('layouts.app')

@section('content')
<div class="container">
  <h2 class="mb-4">Permissions</h2>

  @if(session('status')) <div class="alert alert-success">{{ session('status') }}</div> @endif

  <form method="POST" action="{{ route('admin.permissions.store') }}" class="d-flex mb-3">
    @csrf
    <input type="text" name="name" class="form-control me-2" placeholder="e.g. posts.publish" required>
    <button class="btn btn-primary">Add Permission</button>
  </form>

  <table class="table table-striped align-middle">
    <thead><tr><th>Permission</th><th class="text-end">Actions</th></tr></thead>
    <tbody>
      @foreach($permissions as $permission)
        <tr>
          <td>{{ $permission->name }}</td>
          <td class="text-end">
            <form action="{{ route('admin.permissions.destroy', $permission) }}" method="POST" class="d-inline">
              @csrf @method('DELETE')
              <button class="btn btn-sm btn-outline-danger" onclick="return confirm('Delete this permission?')">Delete</button>
            </form>
          </td>
        </tr>
      @endforeach
    </tbody>
  </table>

  {{ $permissions->links() }}
</div>
@endsectionCode language: PHP (php)
A compact index: add new permissions with a small form, list existing ones, and delete with a button. Pagination keeps the table fast and readable.
4 – Assign Permissions Directly to a User (UI)
Sometimes a user needs one-off abilities beyond their role. This screen lets an admin toggle individual permissions for a specific user.
// app/Http/Controllers/Admin/UserPermissionController.php

namespace App\Http\Controllers\Admin;

use App\Http\Controllers\Controller;
use App\Models\User;
use Illuminate\Http\Request;
use Spatie\Permission\Models\Permission;

class UserPermissionController extends Controller
{
    public function edit(User $user)
    {
        $permissions = Permission::orderBy('name')->get();
        $user->load('permissions');
        return view('admin.users.permissions', compact('user', 'permissions'));
    }

    public function update(Request $request, User $user)
    {
        $data = $request->validate([
            'permissions' => 'array',
        ]);

        $user->syncPermissions($data['permissions'] ?? []); // replaces all direct perms
        return redirect()->route('admin.users.permissions.edit', $user)->with('status', 'User permissions updated.');
    }
}
Code language: PHP (php)
The controller loads all permissions and the user’s current direct permissions. syncPermissions() replaces direct assignments in one go to keep things simple and predictable.
// resources/views/admin/users/permissions.blade.php

@extends('layouts.app')

@section('content')
<div class="container">
  <h2 class="mb-4">Direct Permissions: {{ $user->name }}</h2>

  @if(session('status')) <div class="alert alert-success">{{ session('status') }}</div> @endif

  <form method="POST" action="{{ route('admin.users.permissions.update', $user) }}" class="card card-body">
    @csrf @method('PUT')

    <div class="row">
      @foreach($permissions as $perm)
        <div class="col-md-4 mb-2">
          <div class="form-check">
            <input class="form-check-input" type="checkbox" name="permissions[]" value="{{ $perm->name }}"
                   id="perm_{{ $perm->id }}" {{ $user->hasDirectPermission($perm->name) ? 'checked' : '' }}>
            <label class="form-check-label" for="perm_{{ $perm->id }}">{{ $perm->name }}</label>
          </div>
        </div>
      @endforeach
    </div>

    <div class="mt-3">
      <button class="btn btn-success">Save Permissions</button>
    </div>
  </form>

  <p class="text-muted mt-3">
    Tip: A user’s effective permissions = direct permissions + permissions from all assigned roles.
  </p>
</div>
@endsectionCode language: PHP (php)
Checkboxes make it obvious which permissions the user has directly. The info note helps admins remember that roles also contribute permissions.
5 – (Recap) Assign Roles to a User (UI)
// app/Http/Controllers/Admin/UserRoleController.php

namespace App\Http\Controllers\Admin;

use App\Http\Controllers\Controller;
use App\Models\User;
use Illuminate\Http\Request;
use Spatie\Permission\Models\Role;

class UserRoleController extends Controller
{
    public function edit(User $user)
    {
        $roles = Role::orderBy('name')->get();
        $user->load('roles');
        return view('admin.users.roles', compact('user', 'roles'));
    }

    public function update(Request $request, User $user)
    {
        $data = $request->validate([
            'roles' => 'array',
        ]);

        $user->syncRoles($data['roles'] ?? []); // replaces role set
        return redirect()->route('admin.users.roles.edit', $user)->with('status', 'User roles updated.');
    }
}
Code language: PHP (php)
Roles are your coarse-grained access control. Keep role names short and meaningful; push complexity into permissions where needed.
// resources/views/admin/users/roles.blade.php

@extends('layouts.app')

@section('content')
<div class="container">
  <h2 class="mb-4">Assign Roles: {{ $user->name }}</h2>

  @if(session('status')) <div class="alert alert-success">{{ session('status') }}</div> @endif

  <form method="POST" action="{{ route('admin.users.roles.update', $user) }}" class="card card-body">
    @csrf @method('PUT')

    <div class="row">
      @foreach($roles as $role)
        <div class="col-md-4 mb-2">
          <div class="form-check">
            <input class="form-check-input" type="checkbox" name="roles[]" value="{{ $role->name }}"
                   id="role_{{ $role->id }}" {{ $user->hasRole($role->name) ? 'checked' : '' }}>
            <label class="form-check-label" for="role_{{ $role->id }}">{{ $role->name }}</label>
          </div>
        </div>
      @endforeach
    </div>

    <div class="mt-3">
      <button class="btn btn-success">Save Roles</button>
    </div>
  </form>
</div>
@endsectionCode language: PHP (php)
UI mirrors the permissions screen to keep UX consistent: search, filter, or grouping can be added later as your list grows.
6 – Role-Protected and Permission-Protected Pages
Create one page only Admins can view, and another that requires a specific permission like reports.view.
// routes/web.php

use Illuminate\Support\Facades\Route;

// Only users with the Admin role can access
Route::get('/admin-dashboard', function () {
    return view('admin.dashboard');
})->middleware(['auth', 'role:Admin']);

// Only users who have the 'reports.view' permission (directly or via role)
Route::get('/reports', function () {
    return view('reports.index');
})->middleware(['auth', 'permission:reports.view']);
Code language: PHP (php)
Use Blade directives to show/hide buttons and links based on role/permission, keeping the UI aligned with access rules:
// In a Blade view
@role('Admin')
  <a href="{{ route('admin.permissions.index') }}" class="btn btn-sm btn-outline-primary">Manage Permissions</a>
@endrole

@can('reports.view')
  <a href="{{ url('/reports') }}" class="btn btn-primary">View Reports</a>
@endcanCode language: PHP (php)
This keeps navigation clean: users only see what they’re allowed to access, reducing confusion and accidental 403 errors.
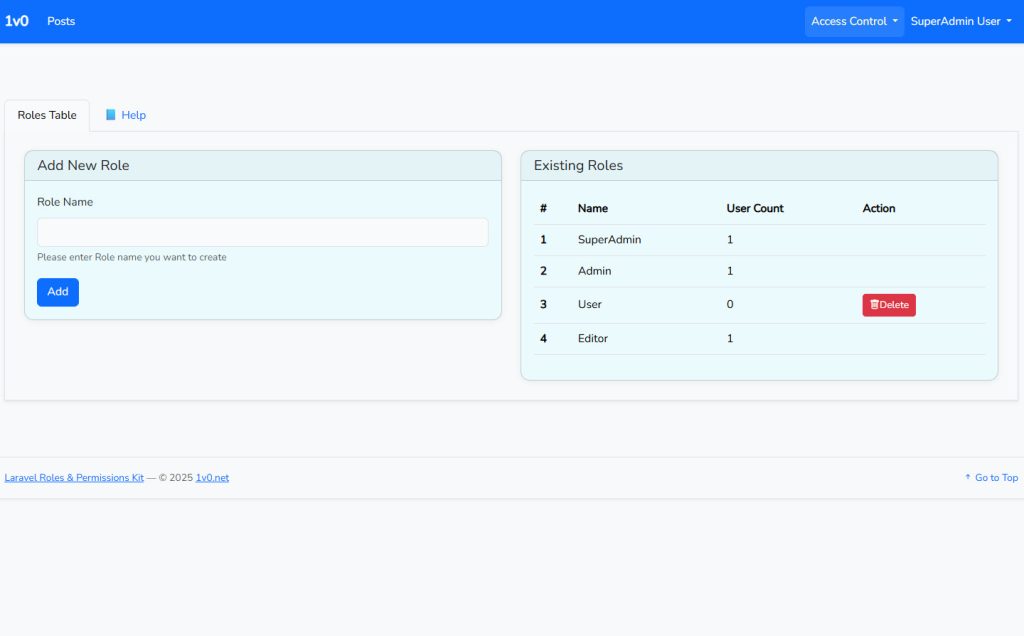
7 – Roles Management UI (Optional Extras)
If you want roles to control their own permission sets through the UI, add an edit screen with permission checkboxes and sync them with $role->syncPermissions([...]). This lets Admins craft new roles from the browser without deployments.
For large lists, consider adding a search box, grouping permissions by area (e.g., Posts, Users, Reports), and a “check all in group” toggle to minimize clicks.
Wrapping Up
You now have a complete, user-friendly Roles & Permissions UI in Laravel 12. Admins can create permissions, assign them directly to users, manage roles, and protect pages by role or permission. With consistent Bootstrap layouts and clear checkboxes, your admin team gets a fast, intuitive experience — and your app gets precise, maintainable access control.
Grab a production-ready implementation
If you don’t want to wire up all the edge cases (UI, roles, permissions, settings toggles, demos), Grab a production-ready implementation:
Laravel Roles & Permissions UI
This lightweight Laravel starter kit helps you quickly integrate user roles and permissions using the popular spatie/laravel-permission package.
0 Comments