Authentication is one of the first features developers add to a new Laravel project. While Laravel Fortify provides a robust solution, sometimes you want to implement basic login, registration, and logout yourself to keep things simple or learn how it works under the hood.
In this guide, we’ll build a lightweight authentication system in Laravel 12 without using Fortify. You’ll see how to create routes, controllers, and views for user login and registration, as well as handle session-based authentication with Laravel’s built-in features.
1 – Setup Database and User Model
Make sure your .env file has database credentials set up and run the default Laravel migration. This will create the users table.
php artisan migrateThe default User model is already included in app/Models/User.php and comes with fields like name, email, and password which are enough for our basic authentication system.
2 – Define Authentication Routes
// routes/web.php

use App\Http\Controllers\AuthController;
use Illuminate\Support\Facades\Route;

// Guest routes
Route::middleware('guest')->group(function () {
    Route::get('/register', [AuthController::class, 'showRegister'])->name('register.show');
    Route::post('/register', [AuthController::class, 'register'])->name('register');
    Route::get('/login', [AuthController::class, 'showLogin'])->name('login.show');
    Route::post('/login', [AuthController::class, 'login'])->name('login');
});

// Authenticated routes
Route::middleware('auth')->group(function () {
    Route::post('/logout', [AuthController::class, 'logout'])->name('logout');
    Route::get('/dashboard', function () {
        return view('dashboard');
    })->name('dashboard');
});
Code language: PHP (php)
Here we define routes for registration, login, and logout. The guest middleware ensures only non-logged-in users can access login and registration. The auth middleware ensures only authenticated users can see the dashboard or logout.
3 – Build the AuthController
// app/Http/Controllers/AuthController.php

namespace App\Http\Controllers;

use App\Models\User;
use Illuminate\Http\Request;
use Illuminate\Support\Facades\Auth;
use Illuminate\Support\Facades\Hash;

class AuthController extends Controller
{
    public function showRegister()
    {
        return view('auth.register');
    }

    public function register(Request $request)
    {
        $request->validate([
            'name' => 'required|string|max:255',
            'email' => 'required|email|unique:users',
            'password' => 'required|min:6|confirmed',
        ]);

        $user = User::create([
            'name' => $request->name,
            'email' => $request->email,
            'password' => Hash::make($request->password),
        ]);

        Auth::login($user);

        return redirect()->route('dashboard');
    }

    public function showLogin()
    {
        return view('auth.login');
    }

    public function login(Request $request)
    {
        $credentials = $request->validate([
            'email' => 'required|email',
            'password' => 'required',
        ]);

        if (Auth::attempt($credentials, $request->filled('remember'))) {
            $request->session()->regenerate();
            return redirect()->route('dashboard');
        }

        return back()->withErrors([
            'email' => 'Invalid credentials provided.',
        ]);
    }

    public function logout(Request $request)
    {
        Auth::logout();
        $request->session()->invalidate();
        $request->session()->regenerateToken();

        return redirect()->route('login.show');
    }
}
Code language: PHP (php)
This controller handles showing login/register forms, creating new users, authenticating credentials, and logging users out. Laravel’s Auth facade is used to manage sessions securely.
4 – Create Blade Views
We’ll need three simple Blade templates: one for registration, one for login, and one for the dashboard.
// resources/views/auth/register.blade.php

<form method="POST" action="{{ route('register') }}" class="card card-body">
    @csrf
    <h2>Register</h2>
    <input type="text" name="name" placeholder="Name" required class="form-control mb-2">
    <input type="email" name="email" placeholder="Email" required class="form-control mb-2">
    <input type="password" name="password" placeholder="Password" required class="form-control mb-2">
    <input type="password" name="password_confirmation" placeholder="Confirm Password" required class="form-control mb-2">
    <button class="btn btn-primary">Register</button>
</form>Code language: PHP (php)
The registration form collects user details and submits them to the register route. Laravel automatically handles CSRF protection with the @csrf directive.
// resources/views/auth/login.blade.php

<form method="POST" action="{{ route('login') }}" class="card card-body">
    @csrf
    <h2>Login</h2>
    <input type="email" name="email" placeholder="Email" required class="form-control mb-2">
    <input type="password" name="password" placeholder="Password" required class="form-control mb-2">
    <div class="form-check mb-2">
        <input class="form-check-input" type="checkbox" name="remember" id="remember">
        <label class="form-check-label" for="remember">Remember Me</label>
    </div>
    <button class="btn btn-primary">Login</button>
</form>Code language: PHP (php)
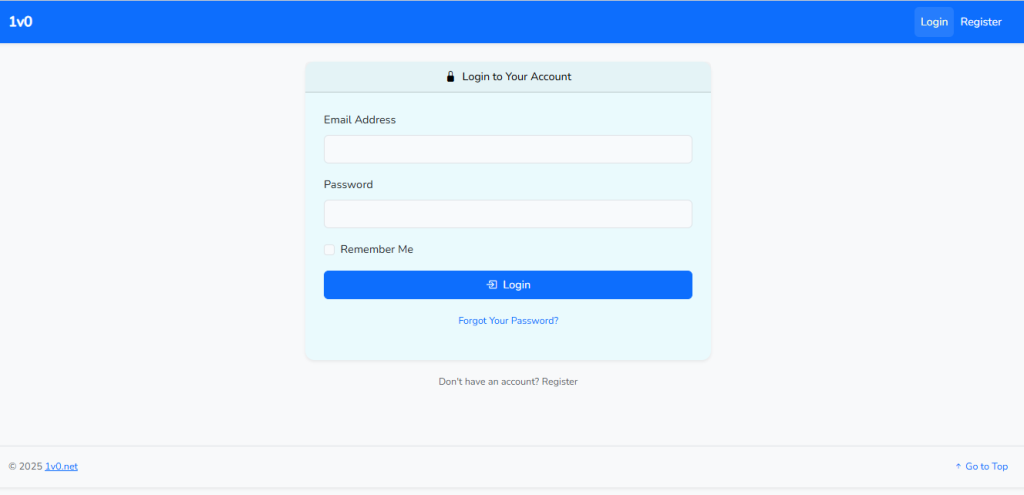
The login form accepts an email and password, and optionally a “remember me” checkbox to keep the user logged in across sessions.
// resources/views/dashboard.blade.php

<div class="container py-5">
    <h1>Welcome, {{ auth()->user()->name }}!</h1>
    <p>You are logged in.</p>

    <form method="POST" action="{{ route('logout') }}">
        @csrf
        <button class="btn btn-danger">Logout</button>
    </form>
</div>Code language: PHP (php)
The dashboard displays the logged-in user’s name and provides a logout form. The auth() helper makes the authenticated user available in views.
5 – Protecting Routes with Middleware
We already wrapped our routes in guest and auth middleware. This ensures only the correct type of user can access each page. For example, if a logged-in user tries to go to /login, they’ll be redirected away, and if a guest tries to reach /dashboard, they’ll be blocked.
6 – Common Errors
Invalid CSRF token
Always include @csrf inside your forms. If missing, Laravel will reject the request with a 419 error.
Session not persisting
Check your .env file for correct APP_URL and SESSION_DOMAIN settings. Also verify that cookies are enabled in your browser.
Too many redirects
This usually means routes are protected incorrectly. For example, if your dashboard route is missing auth middleware, or if your login route isn’t wrapped in guest, you can end up looping.
Password not hashing
Make sure you use Hash::make() when storing passwords. Storing plain text passwords is insecure and will break login attempts.
Email already taken
If you try registering twice with the same email, the validation rule unique:users will stop it. This is expected behavior to keep emails unique.
Conclusion
You now have a fully functional authentication system in Laravel 12 without relying on Fortify. You created routes, a controller, and Blade views for registration, login, and logout — plus middleware protection and error handling. This hands-on approach helps you understand how authentication really works in Laravel, and gives you a foundation to expand with features like email verification, roles, or password resets later.
Next Steps
Now that you have the basics of authentication working, here are some features you can explore next to make your app production-ready:
- Password Reset: Allow users to reset their password using email tokens.
- Email Verification: Ensure new users confirm their email before accessing protected areas.
- Social Logins: Add Google, GitHub, or other OAuth logins with Laravel Socialite.
- Roles and Permissions: Restrict actions with role-based access control (e.g., Admin, Editor, User).
- Security Enhancements: Enable two-factor authentication (2FA) for sensitive accounts.
These additions help secure your app further and provide a better user experience as your project grows.


0 Comments